
How to Get a Headshot for LinkedIn: A Step-by-Step Guide from a Vancouver Photographer
If you're using LinkedIn to advance your career, build your network, or grow your business, your profile photo is doing more work than you might realise. It's typically the first thing people see when they find you — before your headline, before your experience, before a single line of your summary. And it only takes milliseconds for someone to form an impression. So how do you get a LinkedIn headshot that genuinely works for you? This guide covers everything: why it matters, how to find the right photographer, how to prepare, and what to expect on the day.
Why a Professional LinkedIn Headshot Is Worth It
LinkedIn's own data is pretty hard to argue with: profiles with a professional-quality photo receive up to 21 times more views and 36 times more messages than those without. That's not just about aesthetics — it's about credibility. A sharp, well-lit headshot signals that you take your professional presence seriously. A blurry, poorly cropped, or decade-old photo signals the opposite.
Beyond the numbers, there's a more human reason: people connect with faces. A great headshot communicates confidence, approachability, and competence at a glance. Whether you're a lawyer looking for new clients, a consultant expanding your network, or a job seeker trying to stand out, your LinkedIn photo is often the deciding factor in whether someone clicks through to read more — or keeps scrolling.
Your headshot also has a long life ahead of it. A good one will serve you on LinkedIn, your company website, email signatures, conference bios, press mentions, and anywhere else your professional identity appears online. When you think about it that way, it's not a headshot — it's infrastructure.
Step 1: Invest in a Professional Headshot (Not a Selfie)
Smartphone cameras have genuinely improved. But there's still a significant gap between what a phone can do and what a professional photographer with proper lighting, composition experience, and posing direction can deliver. Here's what you get from a professional session that you simply can't replicate at home:
- Expert lighting: Studio or location lighting that defines your features, minimises unflattering shadows, and gives your photo that clean, polished look you see in professional profiles.
- Guided posing: A good photographer directs your body angle, chin position, shoulder placement, and expression — all of which make an enormous difference in how you photograph. (See my full guide on how to pose for a professional headshot for more on this.)
- Background options: Clean studio backgrounds, contextual on-location settings, or whatever suits your industry and brand.
- High-resolution, edited images: Professional retouching, colour grading, and high-res files suitable for every use case.
- Long-term value: A great headshot lasts three to five years, depending on how much you change. The cost per impression, spread across years of use, is extremely low.
For Vancouver professionals looking at LinkedIn headshots in Vancouver, investing in a proper session is consistently one of the highest-ROI things you can do for your professional brand.
Step 2: Find the Right Headshot Photographer in Vancouver

Not all photographers are the same, and headshot photography is genuinely its own specialty. A great wedding photographer or product photographer may not have the specific skills — lighting setups, posing language, the ability to put nervous people at ease — that make headshot sessions work. Here's what to look for when choosing a photographer for your LinkedIn photo:
Review Their Portfolio Carefully
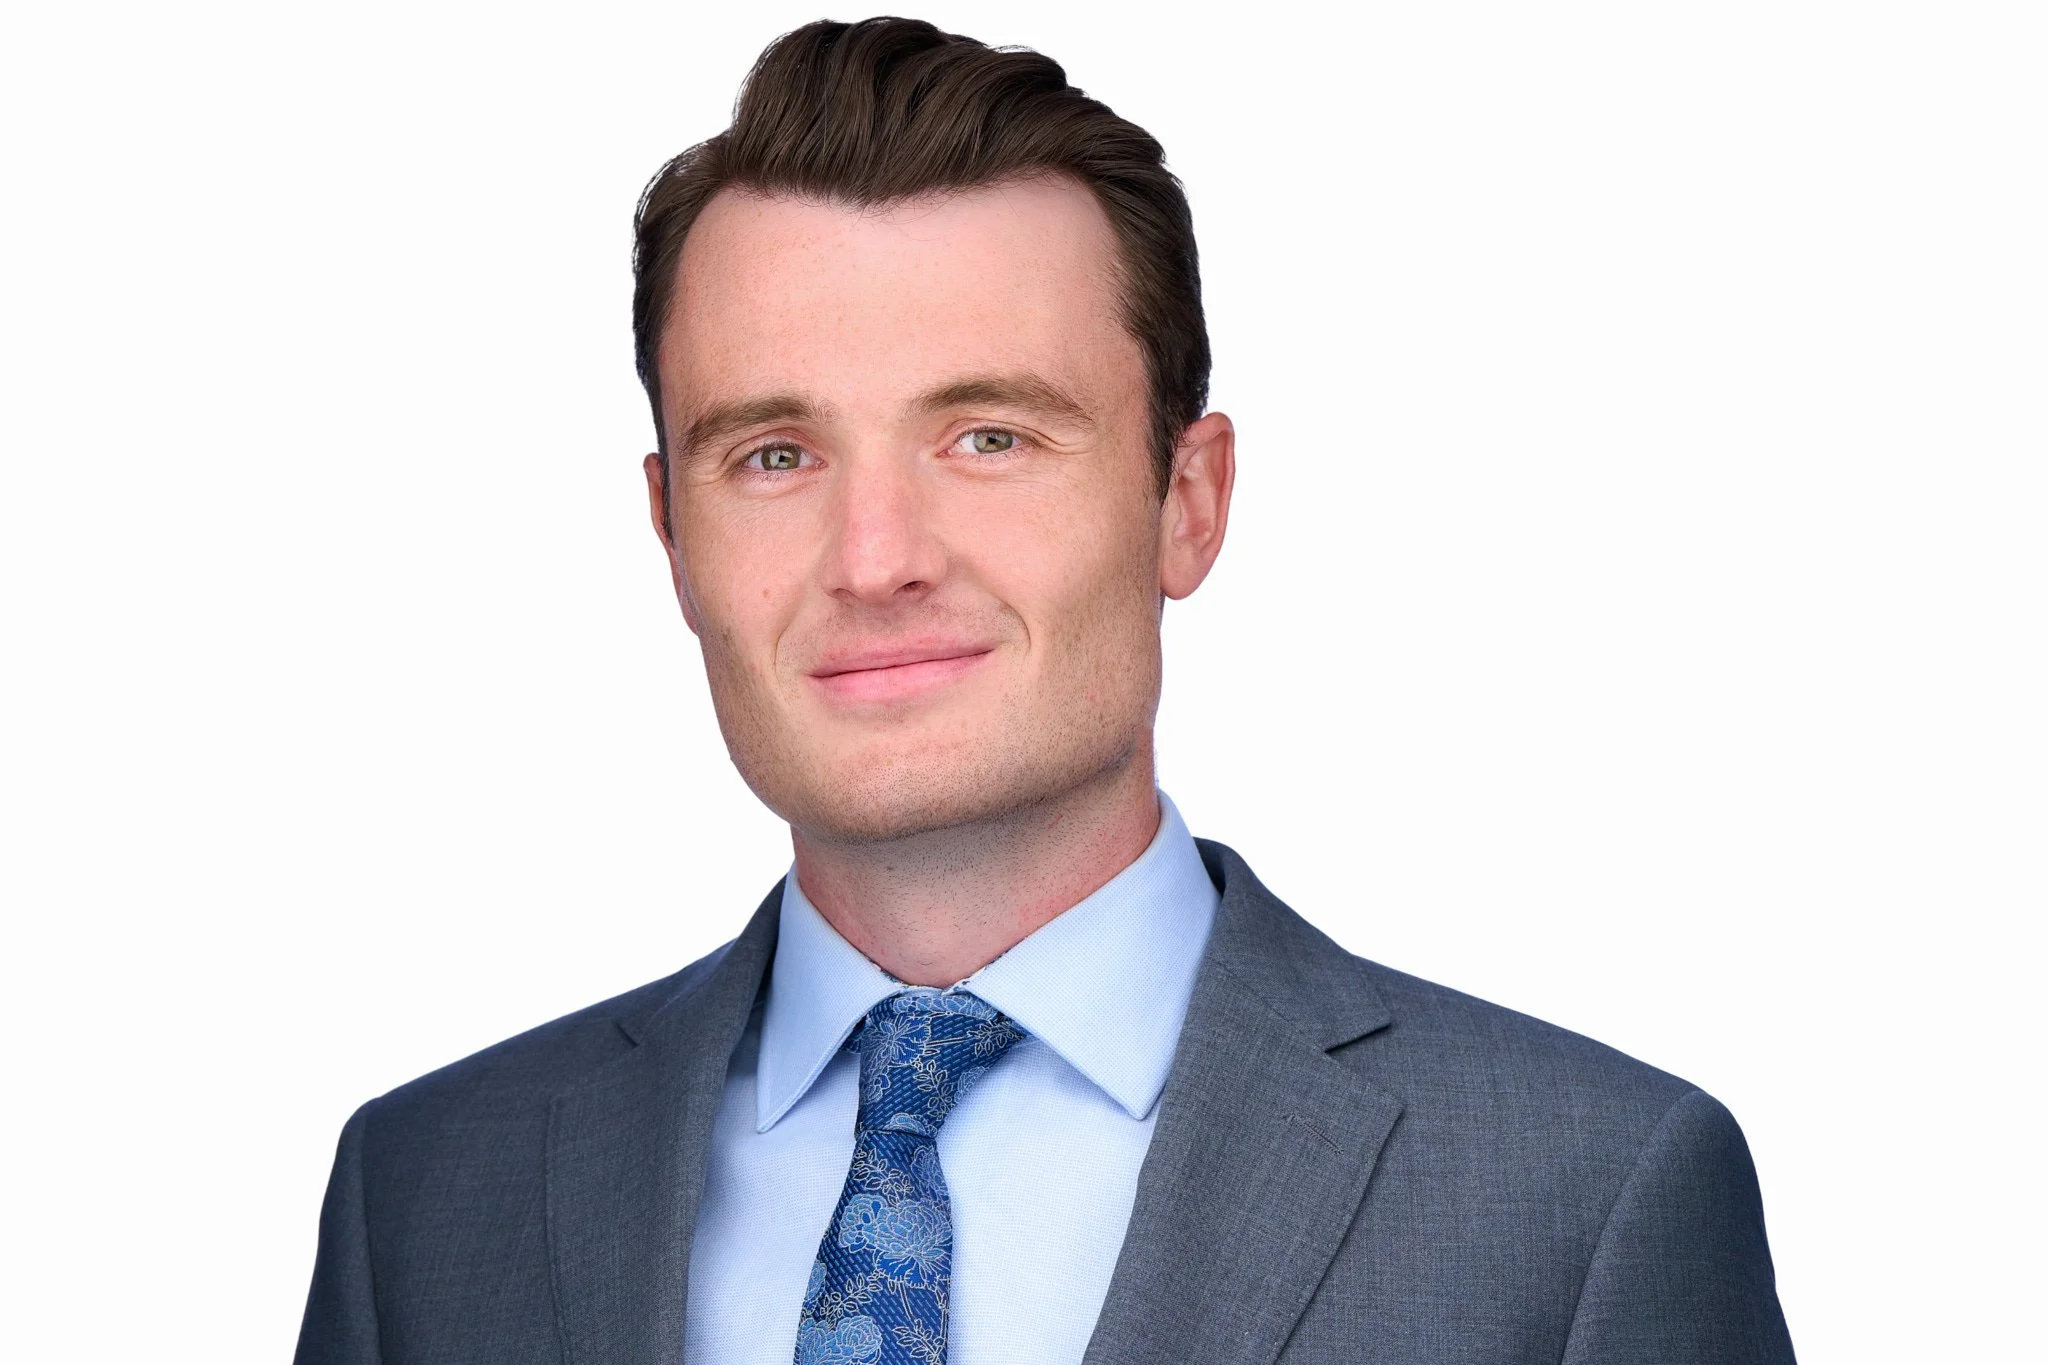
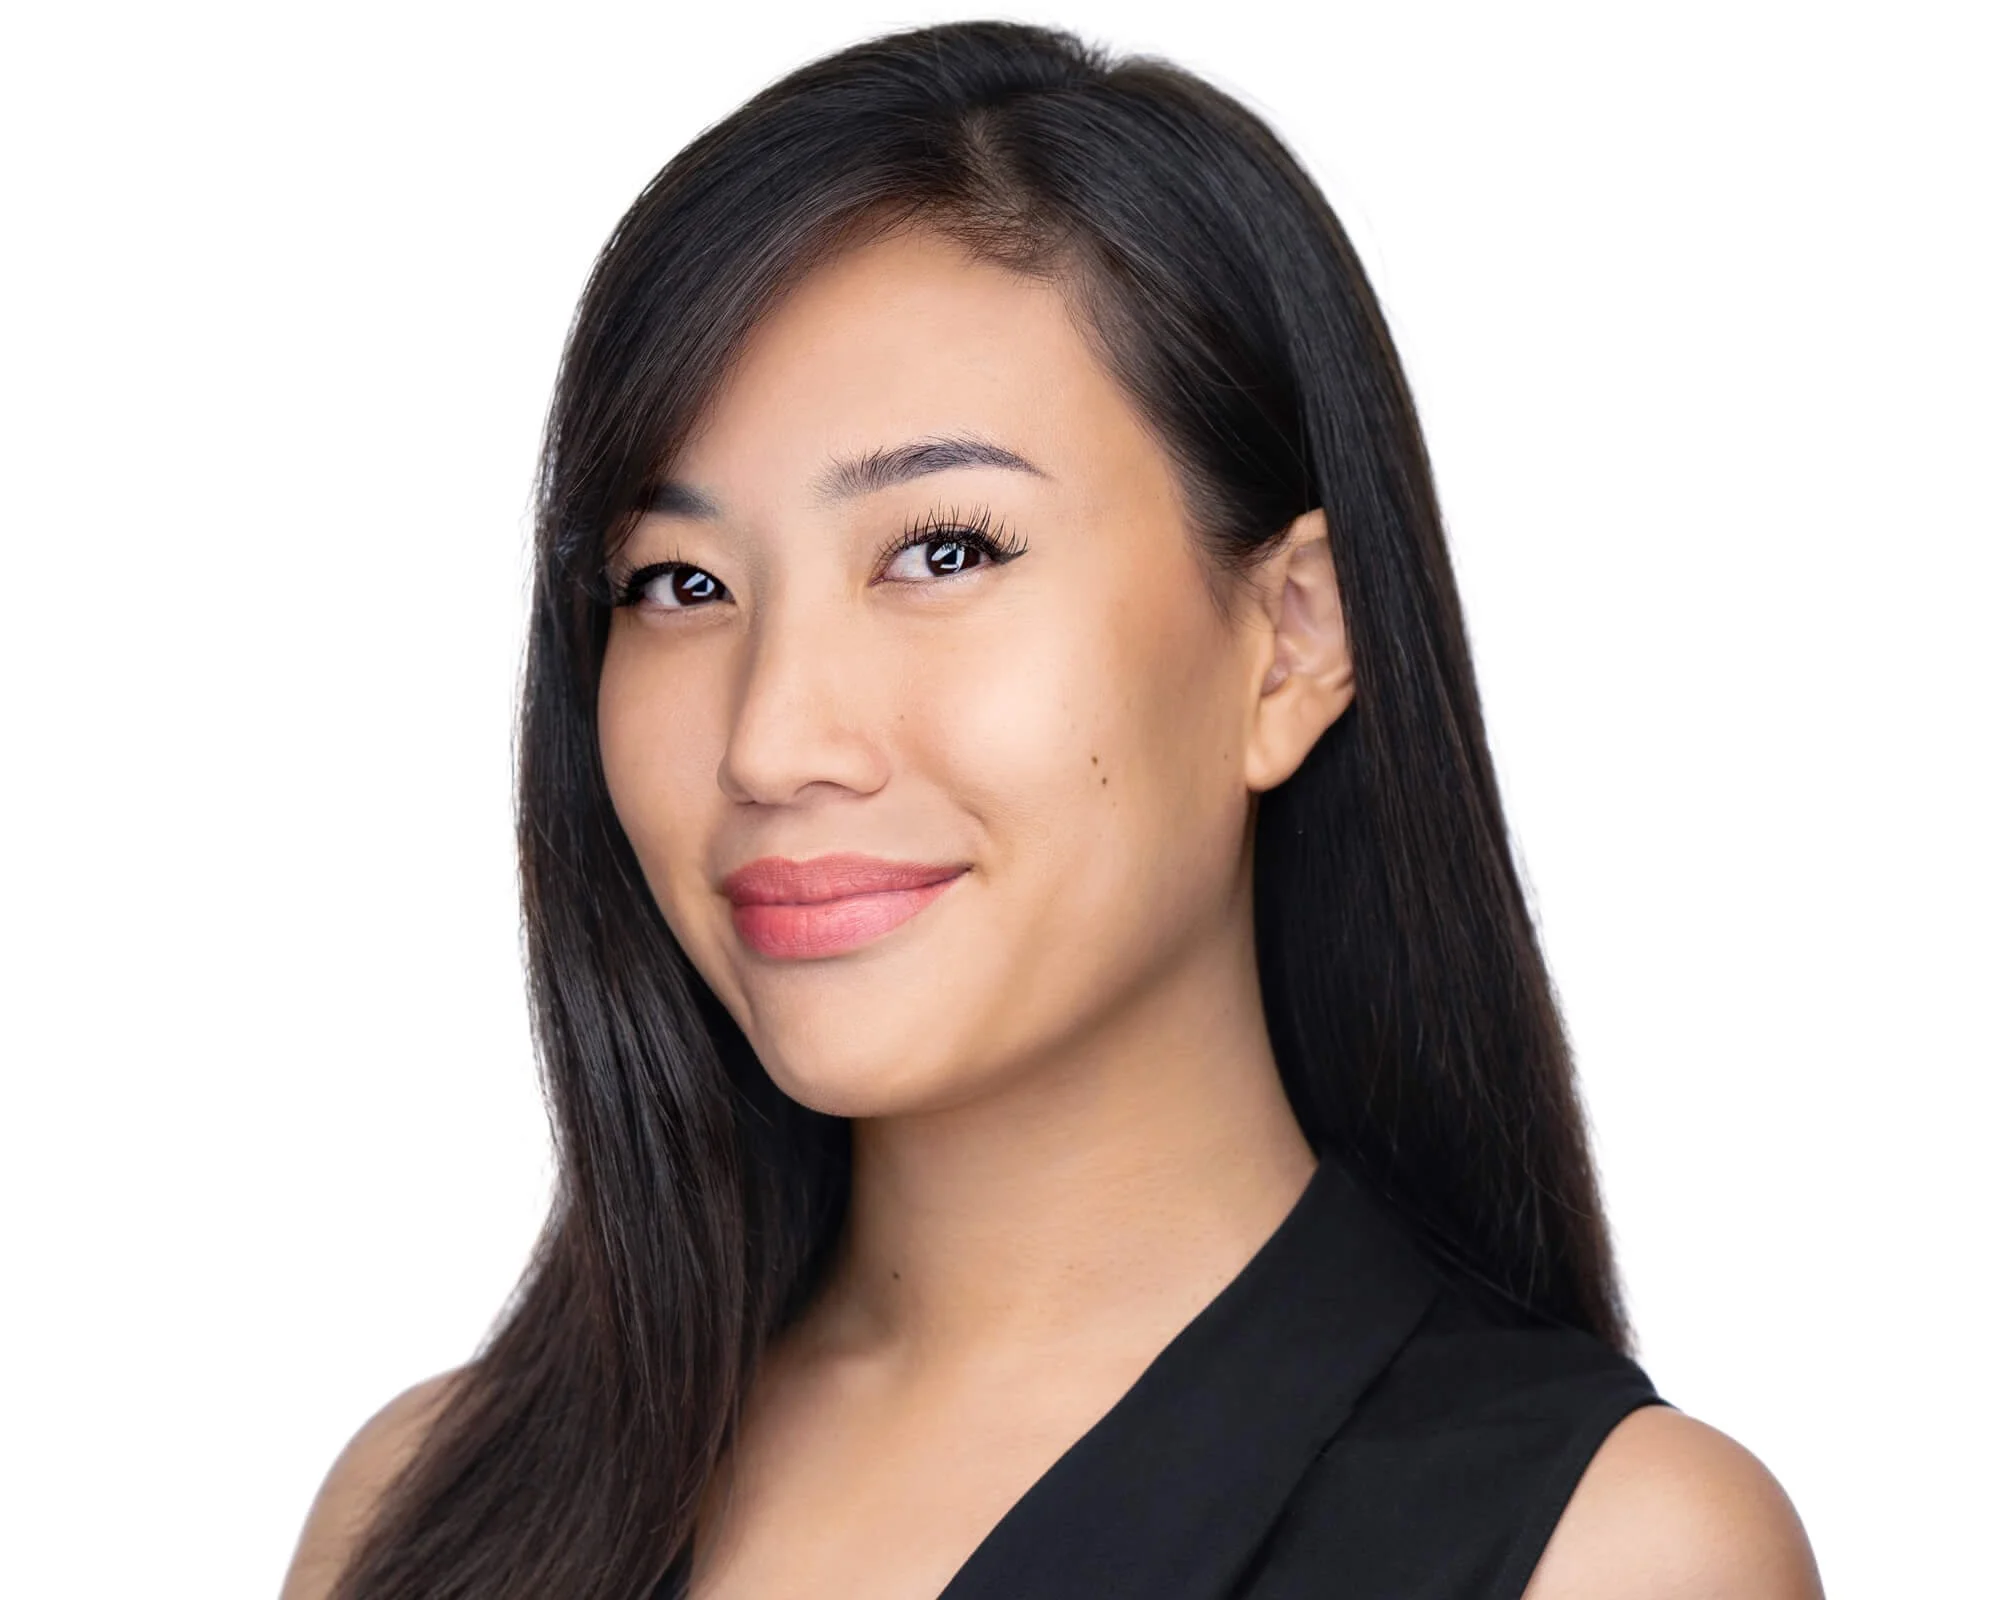
Look for consistency, clarity, and a range of expressions. Do the subjects look natural and engaged, or stiff and performative? Are the eyes sharp? Is the lighting clean and flattering across different skin tones? A strong portfolio is the most reliable indicator of what you'll get. Take a look at my own headshot portfolio to get a sense of what's possible.
Check Reviews and Reputation
Google reviews are your friend here. Look for patterns in what clients say — do they mention feeling comfortable during the shoot? Are they happy with how they look in the final images? Do they mention the photographer being good at direction? These details matter more than a high star rating alone.
Ask the Right Questions Before Booking
Before you book, find out: how many final edited images are included? What's the turnaround time? Are outfit changes accommodated? What backgrounds are available? Is retouching included, and if so, what does it cover? A photographer who answers these questions clearly and openly is a good sign. You can see how I handle all of this on my headshot pricing page, or get in touch directly with any questions.
For a deeper breakdown of what to look for, my post on how to choose a headshot photographer covers the full decision process.
Step 3: Prepare for Your Headshot Session
How you prepare for your session has a direct impact on your results. The good news: the prep is straightforward and doesn't require much time or expense. It just requires some planning.
What to Wear
Solid colours in classic tones — navy, charcoal, black, white, rich mid-tones — are almost always the right call. Bring layers: a blazer or cardigan gives you options for variety within a single session. Avoid shiny fabrics, bold patterns, and anything with visible logos. Dress in a way that reflects your industry while still feeling authentic to you. My full guide on what to wear for a professional headshot covers all of this in detail, as does my headshot outfit guide for women.
Grooming and Skin
Schedule a haircut two to three days before your session — not the day before, because a fresh cut can look too sharp and hasn't had time to settle naturally. Get good sleep the night before (tired eyes are very hard to retouch away). Drink water and moisturise — hydrated skin photographs significantly better than dry skin. For makeup, aim for a clean, natural look that enhances your features without masking them.
Mental Preparation
If you're camera-shy — and most people are, at least a little — read my guide on how to prepare for your headshot session before you arrive. The short version: give yourself enough time to get ready without rushing, arrive a few minutes early, and trust that a good photographer will guide you through everything. You don't need to know how to pose.
Step 4: What to Expect During Your Headshot Session
For most people, a headshot session runs between 30 and 60 minutes. Here's roughly what happens:
Your photographer will start by getting you settled and comfortable — adjusting lighting, checking your clothing for any stray threads or lint, and talking you through what to expect. Then you'll move through a series of positions and expressions. A good photographer is giving you directions throughout: where to place your chin, how to angle your body, when to relax your shoulders, how to find the expression that feels natural rather than performed.
You may shoot in multiple backdrop colours, with different lighting setups, or in more than one outfit. The best headshots don't come from one perfect moment — they come from a rhythm of shooting where you gradually relax and your natural confidence starts to come through. This is why session experience matters: a photographer who makes you comfortable will get better expressions than one who just fires the shutter and hopes for the best.
Many photographers will show you images on the back of the camera or on a screen during the shoot so you can see what's working. Don't be surprised if you look better than you expected — most people do.
Step 5: Select and Upload Your Final LinkedIn Photo
After your session, you'll typically receive a gallery of edited images to choose from. When selecting your LinkedIn photo, look for:
- A natural, confident smile or expression — not forced, not blank
- Sharp focus on your eyes (this is critical — blurry eyes kill an otherwise good photo)
- Clean, uncluttered background that doesn't compete with your face
- Good framing — typically head and shoulders, with the face occupying roughly two-thirds of the frame
- Clothing and overall look that matches your current professional context
Technical Notes for Uploading to LinkedIn
LinkedIn displays profile photos as a circle, cropped to square. Make sure the crop your photographer provides (or that you apply yourself) centres your face well within the frame — nothing is more awkward than a LinkedIn profile photo where half your head is cut off. Use a high-resolution image (400x400px minimum, though larger is always better). Skip filters — LinkedIn isn't Instagram, and filters on profile photos can look unprofessional or odd in the context of a professional platform.
What Makes a Great LinkedIn Headshot: A Summary
- Clean, neutral background that keeps focus on your face
- Natural, confident expression with engaged eyes
- Sharp focus on the eyes, well-lit and clear
- Industry-appropriate clothing in solid, flattering colours
- High-resolution file suitable for digital and print use
- Framing that works as both a square crop and a circle crop
Frequently Asked Questions
How often should I update my LinkedIn headshot?
The general rule is every three to five years, or whenever you've significantly changed your appearance — different hair, glasses, significant weight change, or if you simply look substantially different from your current photo. A headshot that looks like a different person undermines trust rather than building it. If your photo is more than five years old, it's probably time. Book your session and let's get you current.
Can I use the same headshot for LinkedIn and my company website?
Yes, and in fact most professionals do — and should. Consistency across platforms strengthens your personal brand. That said, if your company website uses a very specific background colour or style (e.g., all team photos on a dark grey background), you might want to shoot with that in mind. It's worth discussing with your photographer beforehand so you can get images that work across all your platforms in one session. Read more about corporate headshot services in Vancouver if your whole team needs updating.
What background should I choose for my LinkedIn headshot?
Clean, neutral backgrounds work best — white, light grey, and dark grey are the most commonly used because they're versatile and professional. Some professionals prefer an environmental background (an office, a library, an outdoor setting) to add context and personality. The key is that it shouldn't distract from your face. Your photographer will have options and can advise based on your industry and intended use.
I'm very unphotogenic — is a professional headshot still worth it?
This is the most common concern I hear, and the answer is always yes. "Unphotogenic" usually just means you haven't had someone guide you into good posing, good light, and a natural expression all at the same time. That's exactly what a professional headshot session is designed to do. There's a reason people are consistently surprised by how their professional headshots turn out — it's not luck, it's technique. See my post on how to look slimmer in headshots for one example of how small technical adjustments make a big difference.
How much does a professional LinkedIn headshot cost in Vancouver?
Headshot pricing in Vancouver varies depending on the photographer, session length, number of final images, and whether retouching is included. You can review my full headshot pricing in Vancouver to understand exactly what's included at each level. For context on what to look for and what questions to ask, my guide on how to choose a headshot photographer is a helpful starting point.
Your LinkedIn photo is one of the most-viewed professional images you'll ever have. It's worth getting right. Book your LinkedIn headshot session in Vancouver, or get in touch if you have questions — I'm happy to help you figure out the best approach for your goals.